TLDR: Demo is at https://shaneosullivan.github.io/example-canvas-fill/ , code is at https://github.com/shaneosullivan/example-canvas-fill .
The Problem
When building a website or app using HTML Canvas, it’s often a requirement to support a flood fill. That is, when the user chooses a colour and clicks on a pixel, fill all the surrounding pixels that match the colour of the clicked pixel with the user’s chosen colour.
To do so you can write a fairly simple algorithm to step through the pixels one at a time, compare them to the clicked pixel and either change their colour or not. If you redraw the canvas while doing this, so as to provide the user with visual feedback, it can look like this.

This works but is slow and ugly. It’s possible to greatly speed this up, so that it is essentially instant, and looks like this

To achieve this we pre-process the source image and use the output to instantly apply a coloured mask to the HTML Canvas.
Why did I work on this?
I’ve built a web based app called Kidz Fun Art for my two young daughters, optimised for use on a tablet. The idea was to build something fun that never shows adverts to them or tricks them into sneaky purchases by “accident”. I saw them get irritated by the slow fill algorithm I first wrote, so my personal pride forced me to go solve this problem! Here’s what the final implementation of the solution to this problem looks like on the app.
The Solution
[Edit: After initially publishing, a large speed up was achieved by using OffscreenCanvas in this commit]
Start with an image that has a number of enclosed areas, each with a uniform colour inside those areas. In this example, we’ll use an image with four enclosed areas, numbered 1 through 4.

Now create a web worker, which is JavaScript that runs on a separate thread to the browser thread, so it does not lock up the user interface when processing a lot of data.
let worker = new Worker("./src/worker.js");The worker.js file contains the code to execute the fill algorithm. In the browser UI code, send the image pixels to the worker by drawing the image to a Canvas element and calling the getImageData function. Note that you send an ImageBuffer object to the worker, not the ImageData itself
const canvas = document.getElementById('mycanvas');const context = canvas.getContext('2d');

const dimensions = { height: canvas.height, width: canvas.width };

const img = new Image();
img.onload = () => {
  context.drawImage(img, 0, 0);

  const imageData =
    canvas.getImageData(0, 0, dimensions.width, dimensions.height);

  worker.postMessage({
      action: "process",
      dimensions,
      buffer: imageData.data.buffer,
    },
    [imageData.data.buffer]
  );
};

The worker script then asynchronously inspects every pixel in the image. It starts by setting the alpha (transparency) value of each pixel to zero, which marks the pixel as unprocessed. When it finds a pixel with a zero alpha value, it executes a FILL operation from that pixel, where every surrounding pixel is given an incremental alpha value. That is, the first time a fill is executed, all surrounding pixels are given an alpha version of 1, the second time an alpha value of 2 is assigned, and so on.
Each time a FILL completes, the worker stores an standalone image of just the area used by the FILL (stored as an array of numbers). When it has inspected all pixels in the source image, it will send back to the UI thread all the individual image ‘masks’ it has calculated, as well as a single image with all of the alpha values set numbers between 1 and 255. This means that using this methodology, we can support a maximum of 255 distinct areas to instant-fill, which should be fine, as we can fall back to a slow fill if a given pixel has not been pre-processed.
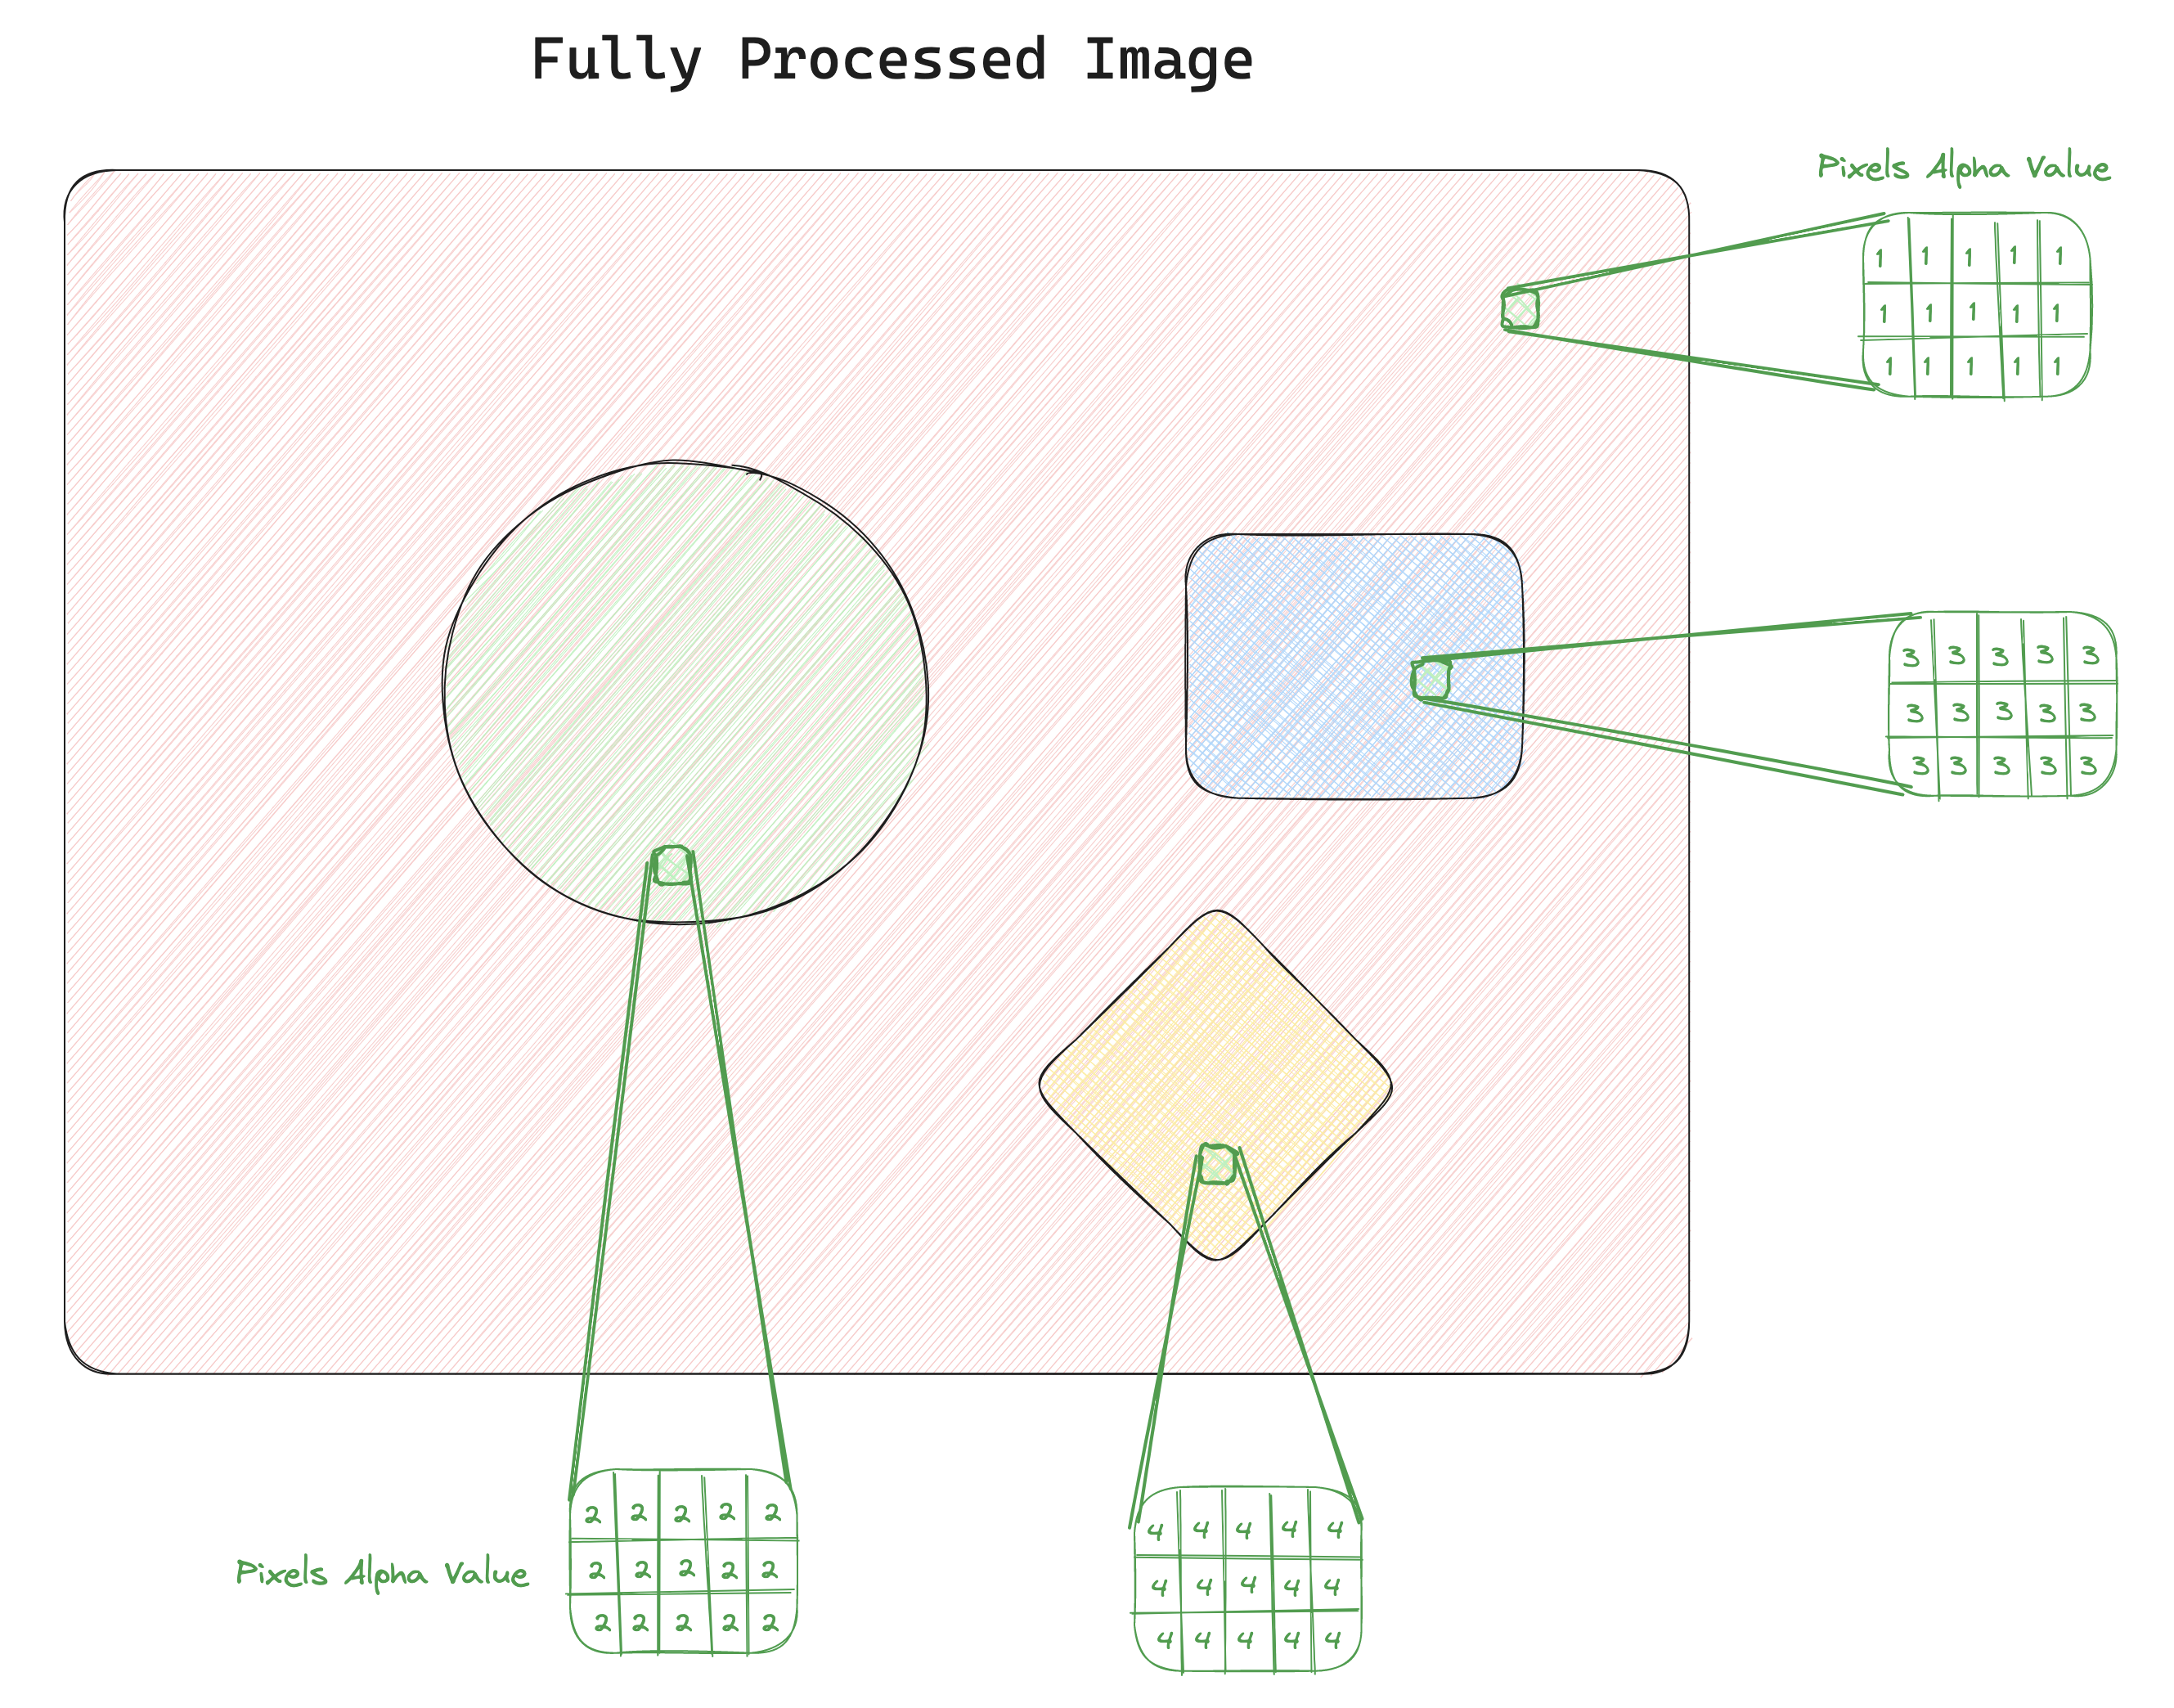
You see in the fully processed image above that all pixels in the source image are assigned an alpha value. The numeric value corresponds to one of the masks, as shown below.

For this image, it would generate four masks as in the image above. The red areas are the pixels with non-zero alpha values, and the white are the pixels with alpha values of zero.
When the user clicks on a pixel of the HTML Canvas node, the UI code checks the alpha value in the image returned from the worker. If the value is 2, it selects the second item in the array of masks it received.

Now it is time to use some HTML Canvas magic, by way of the globalCompositeOperation property. This property enables all sorts of fun and interesting operations to be performed with Canvas, but for our purposes we are interested in the source-in value. This makes it so that calling fillRect() on the Canvas context will only fill the non-transparent pixels, and leave the others unchanged.
const pixelMaskContext = pixelMaskCanvasNode.getContext('2d');
const pixelMaskImageData = new ImageData(
  pixelMaskInfo.width,
  pixelMaskInfo.height
);

pixelMaskImageData.data.set(
  new Uint8ClampedArray(pixelMaskInfo.pixels)
);

pixelMaskContext.putImageData(pixelMaskImageData, 0, 0);

// Here's the canvas magic that makes it just draw the non
// transparent pixels onto our main canvas
pixelMaskContext.globalCompositeOperation = "source-in";
pixelMaskContext.fillStyle = colour;

pixelMaskContext.fillRect(
  0, 0, pixelMaskInfo.width, pixelMaskInfo.height
);
Now you’ve filled the mask with a colour, in this example purple, then you just have to draw that onto the canvas visible to the user at the top left location of the mask, and you’re done!
context.drawImage(
  pixelMaskCanvasNode,
  pixelMaskInfo.x,
  pixelMaskInfo.y
);
It should look like the image below when done

All the code for this is available on Github at https://github.com/shaneosullivan/example-canvas-fill
You can see the demo running at https://shaneosullivan.github.io/example-canvas-fill/
One caveat is that if you try this code on your local computer by just opening the index.html file, it will not work as browser security will not let the Worker be registered. You need run a localhost server and run it from there.
P.S.
Thanks to the Excalidraw team for making it so easy to create these diagrams, what a fantastic app!

Hi Shane! Congrats on starting a startup. I know it’s impossible to pull a founder away…
And I’d love to talk to you 🙂 I think what we’re building will make you smile.
I’d love to integrate what you’ve built at the very least.